Choosing the right Clear Wood Glue can determine whether a furniture joint stays strong, neat, and durable across changing climates. Global buyers often compare drying clarity, bond strength, open time, water resistance, and compatibility with different wood species. A glue that performs well on dry oak may behave differently on humid bamboo or porous pine. That detail matters.
This guide examines seven practical Clear Wood Glue options for workshops, manufacturers, contractors, and careful DIY users. The comparison considers real working conditions, including squeeze-out, sanding, curing time, packaging quality, and storage during international shipping. Some products create nearly invisible joints, while others dry with a slight haze under strong light. Read the label carefully.
Reliable selection requires more than trusting a product photograph or a short marketplace review. Technical data, safety instructions, shelf life, and tested application methods provide stronger evidence. Product performance can also change with temperature, moisture, joint pressure, and surface preparation. Even experienced users can misjudge a glue when the wood is oily or poorly fitted.
No adhesive is perfect.
The following overview balances professional knowledge with practical workshop experience. It highlights where each option may work best, what limitations buyers should expect, and which details deserve closer inspection before purchase. Results may vary, and that is worth admitting. A clear bond is useful, but joint design, clamping technique, and suitable wood preparation remain equally important.
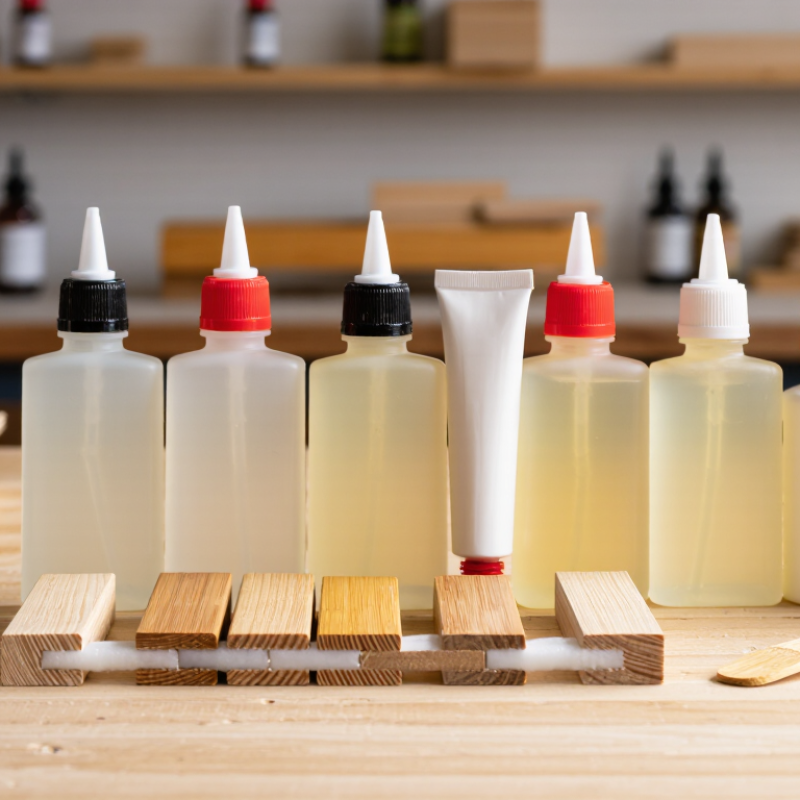
Clear wood glue is an adhesive designed to bond timber while leaving a transparent or nearly transparent film after curing. Most water-based formulas contain polymer particles suspended in water. As water leaves the joint, these particles move together and form a flexible, plastic-like film. That film grips wood fibers inside the pores. It dries clear. However, the final appearance can vary with wood color, glue thickness, and moisture exposure. “Clear” does not mean invisible under every finish.
In practical use, clean, close-fitting surfaces produce more reliable bonds. Spread a thin, even layer, then align the pieces before the glue begins to skin over. Clamp gently; excessive pressure can squeeze out too much adhesive. A damp cloth removes fresh residue, while cured residue may need careful scraping. Drying can feel complete before the center of the joint has fully cured. Allow extra time in cool or humid workshops. I have found that rushing this stage causes more failures than weak glue.
Clear wood glue suits repairs, craft work, furniture details, and visible joints where a white glue line would distract. It is less forgiving on oily, dusty, or poorly fitted wood. Not always. Test a small area on scrap wood first. This can reveal clouding, staining, or finish reactions before assembly. Buyers comparing seven options should check open time, clamp time, water resistance, storage limits, and technical certification. I still treat “water resistant” cautiously because ratings and test conditions differ between products and markets.
Choosing among seven clear wood glue options starts with the project, not the bottle. For pale furniture, choose an adhesive that dries transparent and resists yellowing. A clear finish can still reveal cloudy patches. Test it on scrap wood first. Soft pine absorbs glue quickly, while dense hardwood may need longer contact time. Thin glue suits tight joints. Thicker formulas help with small gaps, but they may spread unevenly.
Moisture exposure changes the decision. Indoor shelves usually need a reliable interior-grade adhesive. Bathroom cabinets, garden furniture, and kitchen repairs need stronger water resistance. Check the stated moisture rating, curing time, and recommended clamping period. Fast-setting glue saves time, yet it leaves less room for alignment.
I once rushed a narrow frame and corrected the joint later; a longer open time would have prevented that mistake. Patience matters.
Woodworkers should also compare viscosity, application control, shelf life, and cleanup. Water-based formulas are often easier to wipe from finished surfaces before curing. Some adhesives require dry, dust-free wood, while others tolerate slight surface variation.
Read the technical data sheet, not only the front label. Global buyers should verify storage temperatures, batch information, safety instructions, and local labeling requirements. A small sample bond can expose weak adhesion, staining, or excessive squeeze-out before valuable timber is involved. Check the bond after full curing, not merely after the clamp comes off.
Seven clear wood glue options perform differently under pressure, moisture, and temperature. Clear-drying PVA suits indoor joinery and leaves a nearly invisible glue line. Aliphatic resin sets faster and sands more easily, but it can show a yellow tint. Polyurethane fills small gaps and tolerates damp conditions, although its foaming needs firm clamps. Cyanoacrylate bonds quickly. It is brittle on wide wood joints.
Epoxy offers strong gap filling and better water resistance. Its mixed resin can remain clear, but ultraviolet exposure may cause yellowing. Acrylic emulsion adhesive provides a flexible, transparent film for decorative panels, yet it usually needs longer drying time. Traditional hide glue remains reversible and useful for repair work, though humidity can weaken the joint. A moisture-resistant PVA formulation sits between standard PVA and polyurethane for many household projects.
Performance should be checked, not guessed. ASTM D905 measures wood-adhesive shear strength, while EN 204 classifies resistance for non-structural wood joints. The USDA Forest Products Laboratory’s Wood Handbook notes that indoor wood commonly reaches about 6–8% moisture content after conditioning. Glue selected for wetter wood may therefore perform poorly indoors if the joint is overbuilt. Apply a thin, even film, clamp without crushing the fibers, and allow full curing. I once trusted “clear” as a quality signal. That was too simplistic. Dry appearance, open time, creep, sanding behavior, and moisture resistance deserve equal attention.
Clear wood glue can create strong, nearly invisible joints when applied with control. The word “clear” does not mean completely invisible on every wood species. Test the adhesive on a small offcut first, especially with dark, oily, or highly porous timber. Sand both surfaces evenly, then remove dust with a dry, lint-free cloth. The joint should fit closely without force.
Apply a thin, continuous layer to one surface, unless the instructions recommend coating both sides. Too much glue increases squeeze-out and may leave a cloudy edge. Assemble the pieces while the adhesive remains workable. Align them carefully, then use moderate clamp pressure. Excessive pressure can starve the joint. Wipe away fresh residue with a slightly damp cloth, but avoid spreading it across the grain. Allow full curing time before sanding or loading the joint. I sometimes rush this stage, and weak joints remind me why patience matters.
Tips: Keep it clean. Less is more. Work within the stated temperature range, because cold conditions can slow curing. In humid regions, allow extra drying time and improve ventilation. Use matching clamps or padded jaws to prevent marks. Check the technical sheet for open time, sanding guidance, and moisture resistance. A scrap test may feel unnecessary, but it often reveals surprising color changes or glue absorption. Inspect the joint after curing, not only immediately after clamping.
7 Best Clear Wood Glue Options for Global Buyers?
Storage, safety, and everyday mistakes often matter more than the label on a clear wood glue. Keep the bottle tightly closed and store it in a cool, dry cabinet. Avoid direct sunlight, heaters, and freezing conditions during transport. A frozen adhesive may look normal after thawing, but its bonding strength can change. Check the manufacturer’s temperature range before ordering internationally.
Clear glue is not automatically harmless. Read the safety sheet, especially when the product contains preservatives or strong solvents. Wear protective gloves and safety glasses during repeated use. Maintain fresh airflow in small workshops. Keep the container away from children, food, and open flames. The label should show curing time, cleanup instructions, and material limitations in language you understand.
Many failures begin with dusty or oily wood. Clean both surfaces, then allow damp timber to dry properly. Apply a thin, even layer; too much glue usually creates a weak, messy joint. Clamp firmly, but do not crush soft wood. Remove squeeze-out according to the instructions, because early wiping can spread glue into the grain. Test a small offcut first. I still sometimes rush that step, and the final finish reminds me. Also, do not assume “clear” means invisible; some adhesives dry slightly cloudy on dark timber. Recheck the cap after every use. A loose cap can ruin an otherwise reliable product.
| Option | Typical Chemistry | Dry Appearance | Typical Open Time | Initial Clamp Time | Moisture Performance | Storage Guidance | Key Safety Points | Common Mistake to Avoid | Best General Use |
|---|---|---|---|---|---|---|---|---|---|
| 1. Clear-drying PVA wood glue | Water-based polyvinyl acetate emulsion | Usually transparent or slightly translucent after drying | Approximately 5–10 minutes at 20–25°C and moderate humidity | Usually 20–30 minutes; full strength commonly develops within 24 hours | Generally suitable for interior, dry applications; not automatically waterproof | Keep tightly sealed, protected from freezing, and preferably between 5–25°C | Avoid eye contact; wash skin with soap and water; use ventilation during extended work | Applying a thick layer or removing clamps before the joint has set | Indoor furniture, trim, crafts, and general wood assembly |
| 2. Water-resistant PVA wood glue | Modified PVA or aliphatic-resin emulsion | Typically dries clear to pale amber, depending on formulation | Approximately 5–15 minutes | Often 30–60 minutes; allow about 24 hours for final cure | Often rated for occasional moisture; confirm the product’s tested water-resistance class | Do not allow freezing; reseal nozzle immediately and store upright where possible | Avoid prolonged skin contact and keep away from children; consult the safety data sheet for export requirements | Treating “water-resistant” as equivalent to fully waterproof or suitable for permanent immersion | Kitchens, bathrooms, exterior-protected joinery, and humid indoor areas |
| 3. Clear-drying polyurethane glue | Moisture-curing polyurethane polymer | Usually amber or translucent rather than optically clear; may foam while curing | Approximately 10–20 minutes | Commonly 1–2 hours; full cure is often about 24 hours | Often suitable for damp or exterior conditions when specifically rated for that use | Store tightly closed in a cool, dry place; moisture in the nozzle can harden the adhesive | Wear gloves and eye protection; avoid contact with skin and uncured adhesive; provide ventilation | Using too much glue; expansion can push joints apart and create visible foam | Mixed-material joints, outdoor projects, and slightly porous or uneven surfaces |
| 4. Two-part clear epoxy | Resin and hardener system, usually mixed in a specified ratio | Clear to slightly amber; color may change with thickness, UV exposure, and age | Approximately 5–40 minutes, depending on grade | Usually 4–12 hours; full cure may require 24–72 hours | Generally high moisture resistance after complete cure; verify temperature and immersion limits | Keep components sealed and separate; protect from heat and direct sunlight; observe shelf life | Use nitrile gloves and eye protection; avoid skin contact; ensure ventilation and follow the safety data sheet | Guessing the mix ratio or using contaminated mixing tools, which can cause soft or uncured adhesive | Gap filling, end grain, repairs, and bonding wood to metal, glass, or stone |
| 5. Clear cyanoacrylate adhesive | Cyanoacrylate, commonly a single-component instant adhesive | Usually clear, though it can leave a white “bloom” on some woods or finishes | Seconds to a few minutes | Often 10–60 seconds for handling; full performance may take several hours | Limited compared with structural wood adhesives; not ideal for large, flexible, or continuously wet joints | Store tightly closed in a cool, dry place; refrigeration is only appropriate if the label permits it | Bonds skin and eyes rapidly; wear eye protection and avoid cotton or wool contact, which can generate heat | Using it for a flexible structural joint or applying it near cotton, wool, or untreated fabric | Small repairs, tight-fitting joints, knots, cracks, and detail work |
| 6. Clear hide or protein-based glue | Animal-protein or other reversible conservation-style adhesive | Can dry clear to amber, depending on concentration and substrate | Approximately 5–15 minutes after application, depending on temperature | Often 30–60 minutes; allow at least 12–24 hours for stabilization | Generally poor resistance to water and high humidity unless specially modified | Follow the supplier’s temperature and shelf-life instructions; liquid versions may require cool storage | Use heat carefully with hot formulations; protect skin from burns and keep containers clean | Using it in a damp location or overheating it, which can weaken the adhesive | Instrument repair, restoration, veneers, and projects requiring future reversibility |
| 7. Clear contact adhesive | Solvent-based or water-based synthetic rubber/resin adhesive | Usually clear or translucent; may remain slightly flexible | Often 10–30 minutes before joining, depending on formulation | Immediate bond after proper contact; strength builds over several hours | Can offer good resistance to occasional moisture, but performance varies substantially by formulation | Keep sealed, cool, and away from ignition sources where solvent-based; prevent freezing for water-based types | Solvent-based products may be flammable; use strong ventilation, gloves, and eye protection | Joining while still wet or failing to align parts, because repositioning is difficult after contact | Laminates, veneers, flexible trim, cork, leather, and large-area surface bonding |
Buyer note: Open time, clamp time, cure time, color, temperature limits, and moisture ratings vary by formulation and climate. For international purchasing, check the technical data sheet, safety data sheet, transport classification, shelf life, and required storage temperature for the exact product.
It is an adhesive for bonding timber with a transparent or nearly transparent film. Water leaves the formula, and polymer particles form a flexible film. The film grips wood fibers inside the pores. Clear does not always mean invisible.
Not necessarily. Wood color, glue thickness, and moisture can change the final appearance. Dark or porous timber may show clouding or absorption. Test a small scrap piece.
Sand both surfaces evenly and remove dust with a dry, lint-free cloth. The pieces should fit closely without force. Oily, dusty, or poorly fitted wood can weaken the bond. Clean surfaces matter.
Spread a thin, continuous layer on one surface. Follow the instructions if both surfaces require coating. Too much glue creates squeeze-out and cloudy edges. Less is more.
Align the pieces while the glue remains workable. Use moderate pressure with padded or matching clamps. Excessive pressure can squeeze out too much adhesive. The joint may become adhesive-starved.
Wipe fresh residue with a slightly damp cloth. Avoid spreading it across the wood grain. Cured residue may require careful scraping. Small mistakes still matter.
Wait beyond the time when the surface feels dry. Cool or humid workshops can slow curing. Allow extra time before sanding or loading the joint. I sometimes rush this stage, and weak joints remind me why patience matters.
Compare open time, clamp time, water resistance, storage limits, and technical certification. Check the stated working temperature range. Treat “water resistant” cautiously because testing conditions can differ. A scrap test may reveal unexpected color changes.
Choosing the right Clear Wood Glue can make a major difference in the strength, appearance, and durability of woodworking projects. This guide explains what clear wood glue is, how it bonds porous surfaces, and why drying transparency is valuable for furniture, crafts, repairs, and decorative work. It also examines key selection factors, including bonding strength, open time, drying speed, moisture resistance, flexibility, ease of sanding, and compatibility with different wood types.
Seven clear wood glue options are compared according to practical performance rather than brand reputation, helping global buyers match adhesive features with project requirements. The guide also outlines proper application techniques, such as preparing clean surfaces, applying an even layer, aligning parts carefully, and using suitable pressure during curing. Finally, it covers storage, safe handling, shelf-life protection, and common mistakes—such as applying too much glue, working on damp wood, or removing clamps too early—to help users achieve strong, neat, and nearly invisible joints.

Jinfang